|
|
Heaters:
1.
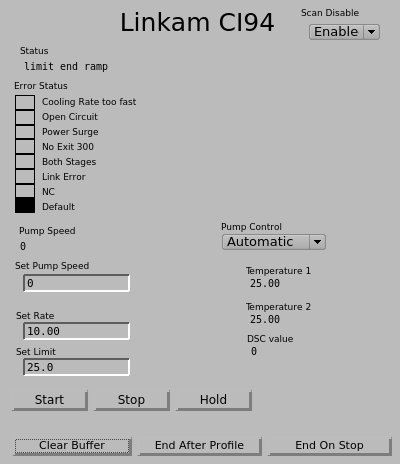
Linkam Hot Stage Interface and Useful SPEC Macros
How to Use
- To open MEDM window, click "Devices" and
"Linkam hot stage" from the main MEDM window(12idb_all.ui).
- Set "Enable" on the right top popup menu.
- Click "Start" will make this software
constantly regulating temperature.
- To turn off heating or cooling, click "Stop"

Nomenclature
- Set Rate : Heating or Cooling Rate. A
positive number regardless of heating or cooling.
- Set Limit : Target temperature. When
the temperature is reached, it will be kept until new value is punched
in.
2.
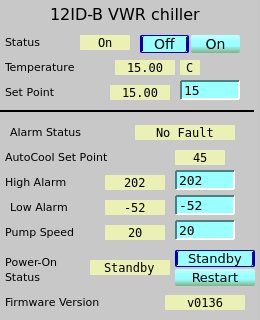
VWR Wather Bath / Chiller
- Epics software : 12idb_all.ui >
Devices > VWR Chiller

3.
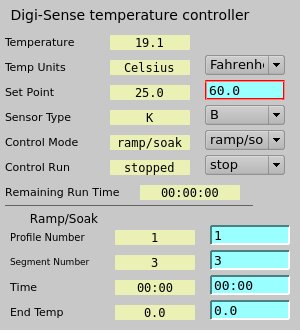
digi-Sense controller
- Epics software : 12idb_all.ui >
Devices > digi-sense

4.
Multi-Sample Heater Python-Based Control GUI
Multi-Sample
Set/Hold Experiment
- Initiation : click a menu from SpecGUI
- Users set temperatures without specifying rate
and wait long enough to assume the temperature is reached.
Tables
- It has two tables. One on the left is for
sample information such as sample name, positions and wanted exposure
time (s). One on the right is for temperature profiles.
- Use the tables to input the information about
sample and experiment. You can load from or save to text files.
Multi-sample
Heater Control
Example for Sample Table
Let's say you mounted three samples in an array in
a row.
- After mounting the stage, align your first
sample to the beam.
- On SPEC, set sth 0 and set
sav 0. Then, the position of the first sample will become a
reference to other samples.
- Type in or load the sample information to the
left table. Sample Name, X (sth), Y (sav), Exp. Time (s), and Enable (1
or 0). For samples with Enable 0, data will not be taken.
- Save Sample As or Save.
- Click "Collect X-ray Data" button below the
table and data will be collected for all three samples.
Example for Experiment
Table
Let's say you plan to measure the sample at RT,
heat up to 100 oC for annealing for 20 mins, and measure data while
cooling down from 80 oC with 10 oC step and 10 mins dwelling at each
temperature before taking data.
- Temp : 25, Dwell Time(s) :
0, Run(Yes/No): 1, Sav Shift: 0
- Temp : 100, Dwell Time(s) :
1200, Run(Yes/No): 0, Sav Shift: 0
- Temp : 90, Dwell Time(s) :
600, Run(Yes/No): 1, Sav Shift: 0
- Temp : 80, Dwell Time(s) :
600, Run(Yes/No): 1, Sav Shift: 0
- ...
- Temp : 20, Dwell Time(s) :
600, Run(Yes/No): 1, Sav Shift: 0
- Save Experiment As or Save.
- Click "Run Experiment" button.
Temp (oC) :
Temperature at each step.
Dwell time(s) : Time required
to reach the temperature + Annealing time that you wish.
Run (Yes/No) : Do you want to
collect Data for the step.
Sav shift : If you would like
to shift sample vertically in case you are worried about beam damage,
type the number in mm unit.
- File Format
- Generic text format for the sample list
 # sample name, X, Y, exposure time(s), enable
 mysample1, 0, 10, 0.1, 1
- Generic text format for the experiment list
 # temperature, dwell time(s), run(yes/no), sav shift(mm)
 50, 100, 1, 0
- STD text format for the sample list
- sample position mnemonics: alphabet
for the row and numeric for column.
- For example, 2a is for
the sample at the second column in the first row. Thus, X = 10 and Y =
0.
 # sample position mnemonics, sample name, [exposure time(s)]
 1a, testsample1
 1b, testsample2, 0.1
 2c, testsample3
Temperature
Ramping Experiment
- Initiation : click a menu from SpecGUI
- This is for both Linkam and Multi-sample stage.
- Choose the type of heater from 'Heater' menu.
Tables
- When multi-stage is selected, a table for
inputting samples info will pop up. See above for how to use.
- Use Heating Stage table for Temperature program
Temp (oC) :
Temperature at each step.
Rate (oC/min) : Ramping rate
for each step.
Time(mins) : Time to dwell
after the ramping is over.
Collection Freq.(s) : How often
will you measure data during the dwell time. 0 for no data collection,
-1 for only one after the dwell, and any other positive number for
seconds of data collection periodicity.
Scan Range (mm) : If you want
to scan in each collection, type positive number, for example 2 for -2
~ 2 mm. Otherwise, 0.
Scan Dir.(h/v) : Scan
direction. Either horizontal (h) or vertical (v).
#Scan Points : When you scan,
how many points to measure within the scan range. 0 for no scan.
Motor Motion
- If sample may not be homogeneous and you want
to scan samples every time when you collect data, use the table for
either horizontal and vertical direction.
- When you are sure that your sample is
homogeneous across many area of the sample and you are worried about
the beam damage, then you can raster the sample, meaning that measuring
different spot whenever data is collected. For the following two
motors, provide ranges and steps in absolute position. Samples will be
moved in sth direction first. When sth position reaches High Limit, the
sample will be shifted by step of sav and sth will start from Low
Limit. Units are in mm.
|
|

