|
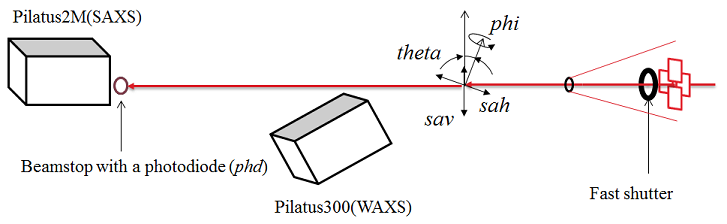
General Beamline Operations1. Beamline Device Layout and Motor Motions
|
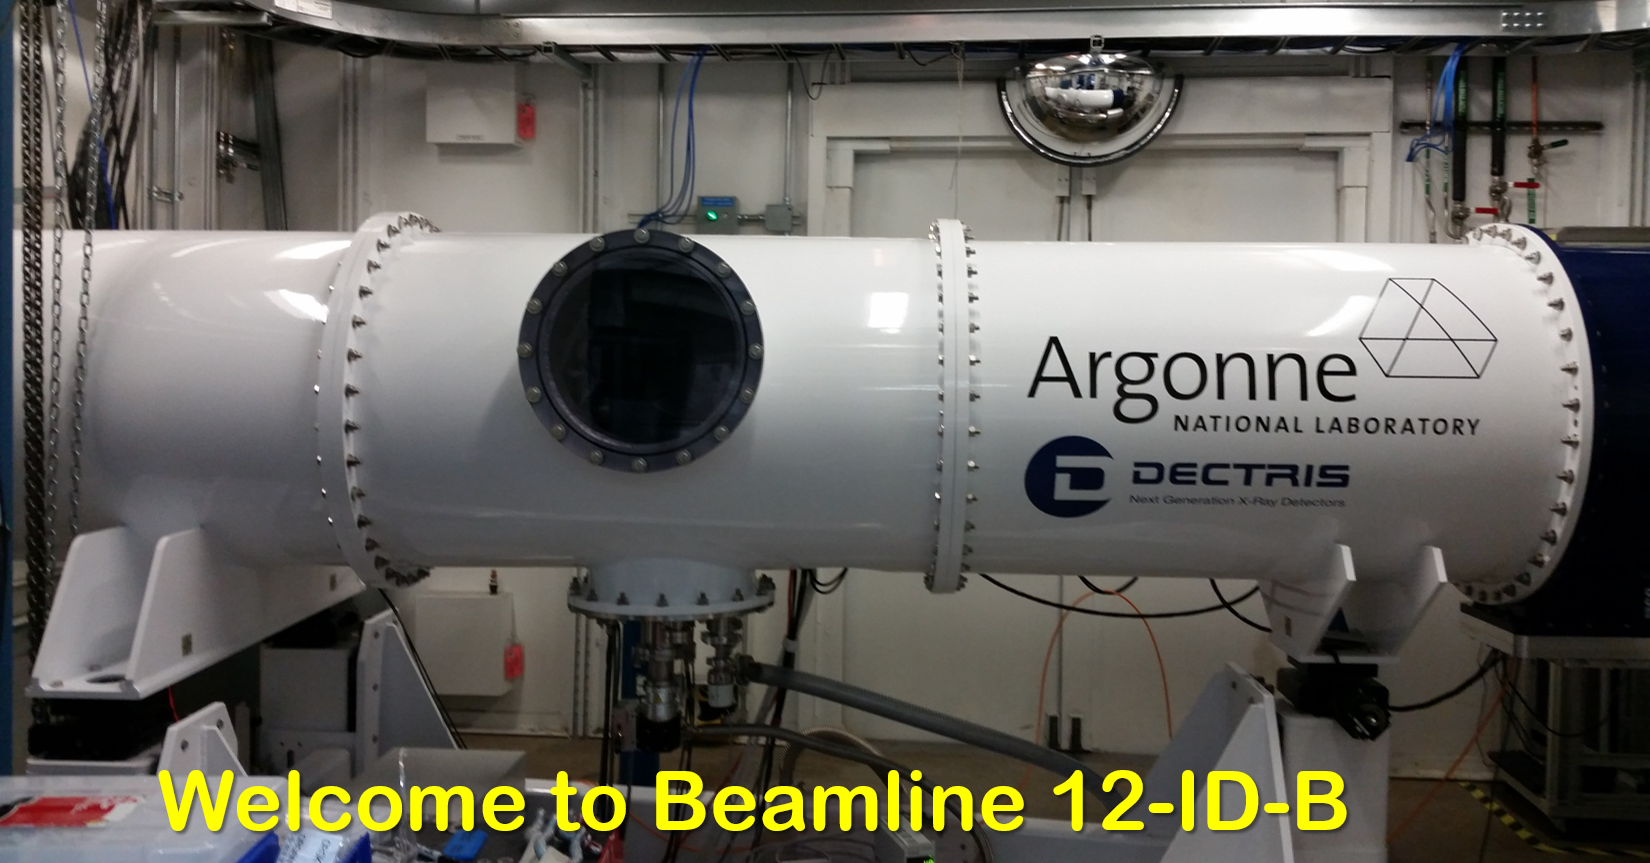
| 12ID-B
specific |
Macro name | Purpose |
Usage | Note
[units] |
| Yes | takeshot | Take
SAXS/WAXS images |
takeshot
filename exposuretime takeshot filename exposuretime Nshot takeshot filename exposuretime Nshot Period Example: takeshot bsa 1.0 30 3.0 collecting thirty images for sample bsa with exposure time of 1.0 sec and period of 3.0 sec. within the 3.0 sec period time, only 1.o sec for data collection, the rest 2.0 sec is sleep time. |
exposuretime:
second Nshot: number of shots Period: second filename: should be readable but short |
| No | umv | Move
a motor to an absolute position |
umv
motorname absoluteposition Example: umv sth 20.5 move motor sth to postion 20.5 |
absoluteposition:
mm "Ctrl"+"c" combined key can abort the move |
| No | umvr | move a motor by certain distance relative current position | umvr
motorname relativeposition Example: umvr sav 1.5 move moter sav +1.5 mm relative to the currrent sav position |
relativepoisiton:
mm |
| Yes | centering | GISAXS
sample align |
Align
a sample angle and height to X-ray beam Example: centering automatically align the sample |
|
| Yes | shopen | Open
the fast shutter |
shopen shopen time |
time:
second |
| Yes | shclose | Close
the fast shutter |
shclose |
|
| No | lup | line up |
lup
motorname relativeleft relativeright Nshot expt Example: lup sth -2.0 3.0 40 0.1 scan sth motor in position range [- 2.0 +3.0] relative to current sth position; measure for 40 positions, exposure time of 0.1 sec at each pos |
|
| No | ct | Count |
ct
seconds |
|
| No | te | Current
temperature |
te |
|
| No | att_on; att_off | attenuator on / off | ||
4. Data Collection Python Interface: specGUI
specGUI is a python-based GUI program that can communicate with SPEC and operate motor move and data collection. Users can press buttons instead of typing commands on SPEC. It works only when SPEC runs on server mode. See SPEC for how.When SPEC is running, start specGUI by: (1) Open a terminal. (2) Type, cd ~/python_codes; (3) Type, startSpecGUI
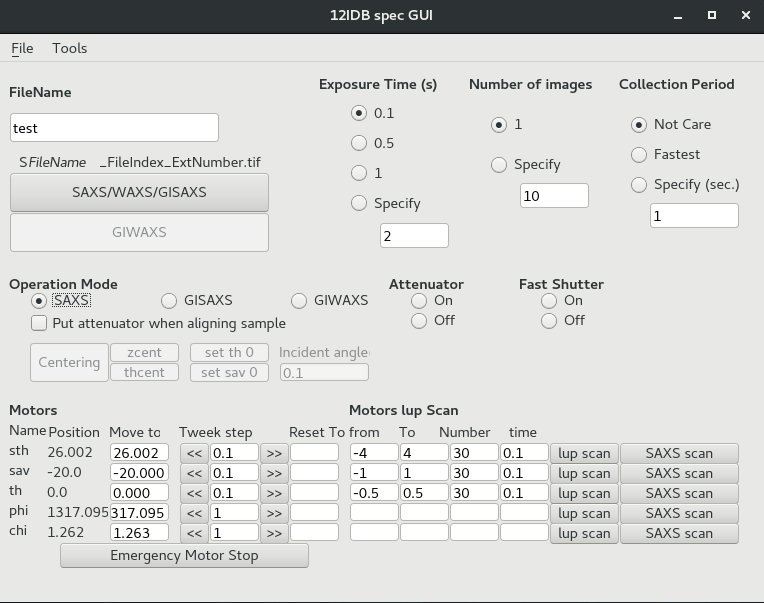
lup scan: same as "lup" scan command, run with specific parameters
SAXS scan: take image in the specified motor position range.
5. Creating New User Folder for Data Collection
User data folder is closely connected with the data collection and processing programs. Changing data directory in SPEC or making new arbitary directory will mess up data collection. Here is the correct way to make a new user data directory:(1) from "12IDB spec GUI", click "File" menu, then "New User Dir." A window of "Make New User Directory" will pop up.
(2) fill fields in this window like below. Click "OK" to make a new user directory.
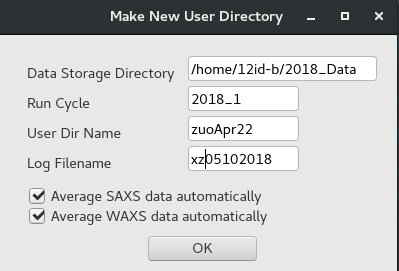
The above window will make a user directory of : 2018_Data/2018_1/zuoApr22.
The spec log file will be "xz05102018"
You will also see some print-out information in the SPEC window about making the new directory.
Note: If you cannot see your collected images/data, it could be caused by wrong data directory. You can make a new user data directory and see if it solves the problem. Normally, the data transfer and converting programs will follow the new user directory and you don't have to do anything on that.
6. GISAXS Sample Alignment
- GISAXS measurement may require aligning the top surface of a sample
- Exactly to the middle of beam (Half position)
- Parallel to the beam
- To do so, users need to align theta angle.
Manual Sample Alignment
- Looking at the sample on cameras, move the sample vertically using umvr sav xxx or if necessary, horizontally umvr sth xxx.
- When the vertical position is close to the beam, type shopen to open the fast shutter.
- Keep eyes on the GISAXS photo diode counter value and remember the full beam intensity that is the value with sample below the beam.
- Move up the sample by typing umvr sav 0.1 until the GI photo diode value becomes the half of the full beam.
- Align the theta by typing lup th -1 1 50 .1.
- Find a tip of the lup scan and move theta motor to the tip, for example 0.12, umv th 0.12.
- Set the theta position as 0, set th 0
- Repeat 4-7.
Automatic Sample Alignment
- When a sample was already aligned and a new sample with almost the same substrate thickness is now mounted replacing the old one,
- You can use centering command.
- To do so, keep in mind. the top surface of the new sample should be within +- 2mm of the beam.
- Otherwise, set sav 0 after you manually bring the top surface close to the beam.
chi Alignment
- Align th and sav either manually or using centering.
- lup sth -3 3 50 .1
- umvr chi 1 or umvr chi -1 depending on the slope of the lup scan.
- zcent to align the sav again.
- repeat 2-4 until the slop of the lup scan becomes 0.